Balcony Design Decisions
Why was it done this way
Originally the “mezzanine balcony” looked “something like a disorganized dormitory” until the partitions were installed. Each child set up a bed and grouped possessions in the area where his future bedroom would be.” (Jacobs, 1978)
At the time of building the Solarhemicyclo (Wright’s name for the design), The Jacobs had three children. Susan, Elizabeth, and William eventually had three rooms carved out in the mezzanine balcony. This left the west room; I assume was used as Herbert’s office as in those days the concrete block barn/art studio had no heat. This was what my father (his office) did too as he placed the five of us into the original three bedrooms.
Thoughts During Restructuring
I rethought the usability of this home as I had to dismantle the original balcony usage. In the various living combinations, which I had in this house over my 20-year history with the house, fewer people worked much better than the fuller variations.
The darkness of the upstairs always pushed us to be downstairs. As I have mentioned and you can see above, the limestone surrounds on the end rooms and the three south walls of each existing bedroom left virtually all the light upstairs coming from the north window wall which had a significant overhang.
I decided to make the upstairs feel more like the rest of the house: bright and airy.
Partitions
The dormitory partitions consisted of seven walls of screwed together cedar. These rooms were dark. Their only light came from a curtained doorway to the south and about 13” windows at eye level which were the north window wall. Further, there was an overhang of the roof to the north having the windows shaded and darker than a normal house’s windows. Four walls ran north to south separating the three rooms. The remaining three walls ran across the south side of each bedroom defining a balcony walkway and granting some privacy to each room. These south walls went all the way up between the rafters blocking what little light which might have flowed in from the south solar wall.
Inside the Rooms
I have described spaces internal to the house in terms of roof sections. Theses sections were defined by the house rafter system where the rafters radiated from a center point in the middle of the sunken garden. One can get an idea of these sizes in various photographs which also make up this book. Each balcony “dorm” room was three sections. Each had a small built-in closet sticking out into the room on the south partition starting at the west side of each doorway which were all on the east ends of the room. The base dimension of these built-ins was about 5’ wide (one section) with about an 18” wide shelf 18” deep. The rest was an area to hang clothes (40” or so). There was a brass rod at the top and a curtain one could slide around. This positioning required the bed need to run along the north stone wall. Eventually, we had desk spaces in the last section of the room along the south wall. The west room had a similar closet along the partition to “dorm room 3” having its best placement with the head of the bed against the north stone wall.
Dismantling the Darkness
I did not have any preconceived plans for the upstairs. My focus was one making the house functional again with a new energy efficient radiant floor. As many of the other known energy leaks were also my only initial goals. The requirements to bring the house into current codes started a slow transition to the balcony. The rafter restructure required the three south partitions to come down immediately. To have a large enough second floor woodshop required pulling out most of the partitions which separated the rooms. This created an upstairs space which was now wide enough for the upstairs wood shop. With the space opened for the first time in a very long time, it proved to be amazingly bright up there. Also, with the walls in pieces, I thought about how nice it would be to freshen up those amazingly wide cedar boards in the process of replacing them.
New Design Gels in my Head
I did not make any final choices until all the previously documented projects were completed. The radiant floor, rafters, roof, skylights, south solar wall, and the north window wall were all done. As I mentioned the project came into being in the spring of 1982 when the farmhouse I was living in was sold and I quickly moved back into the empty family home. I was working full time at a new job so my projects which were independent of contracted work waited on my time availability. The photos which follow all have a completed solar wall. This was the last of the shell and finally completed a bit before Christmas of 1982.
Balcony Plan
At the center of this plan lay two key elements. The around 15” wide cedar boards which had been used for the first dormitory partitions were incredible. The brightness from the new open area on the balcony finally made the second floor an extension of the rest of the house. This brightness was aided by my decision to augment light to the upstairs with five carefully added skylights. By this time, the roof and the skylights were in.
I planned to have others help offset the cost of the house and share the incredible living experience. One of the things to note here is a closet in 1982 was not really a thrill but a need. Laurie was not a clothes horse but really? My skylight in the west room really enhanced that room as the light flowed down from the skylight over the rock wall. By this time the new rafters blended in, and the balcony was almost done being restored. The old partition can be seen with a complex cut which allowed the old south partition to join. Also visible is the cut-out allowing a less chopped view out the north window wall. The old cedar boards are dark and unimpressive.
I created a four-section open area. The bedroom at the top of the stairs and the west stone room would complete a three-bedroom re-design. No longer would the upstairs be constrained as a historic dormitory. Each room would get a walk-in closet. This led to two north radiating partitions to define the walk-in closet for the west stone room and three for the bedroom at the top of the stairs. This required a one section south wall for the west room walk-in closet and a four-section south wall for the replaced east room. This was an increase in one section for the new walk-in closet in each of these two bedrooms. One small change to the south walls was a gap to the south defined by the rafters to allow light to spill into the spaces over all the south partitions. You can see in the above photo where the framing stops at the bottom of the rafters.
New Partition Preparation
Before doing this, my only saw was a motorized miter saw with a foldable table to hold longer boards. I wanted the new partitions to be as spectacular as I knew they would be and needed to be able to create the complex cuts needed to replace all the old partitions, but in a new design. I bought a radial arm saw capable of 16” or so complex cuts and I borrowed planer able to handle the width of these boards.
This shows the start of the west room’s new closet. This was the new partition before a coat of Danish oil which made the grain in these boards pop alive.
Hours and Hours
The previously mentioned equipment produced copious amount of wood shavings and saw dust in the old shop with the planer by the door between the utility room in the tower. This allowed the longer boards to start in the shop and plane through into the utility room. Planning took several runs at each side to get a baby smooth surface. Each board took 3-4 trips down to the shop and back to get the angle right so that not only would the corners join perfectly, but also the line up from the floor would be perfectly straight. Renewing and placing the new partitions took a very long-time, weeks upon weeks.
Upon getting into the process, I framed out the location where the bedroom at the top of the stairs had been. This room also received a walk-in closet. This photo shows the original partition walls. It was easiest to dismantle the old partitions left standing as I needed the wood for the new walls.
The hours were long to get the first partitions up to add a closet to the west end room. The results and the way the cedar popped after oiling was very satisfying.
This shot, after I removed the last of the original dorm room partitions, starts to give a great feeling to the new upstairs open area with the light it gets from both window walls and two skylights.
And Today
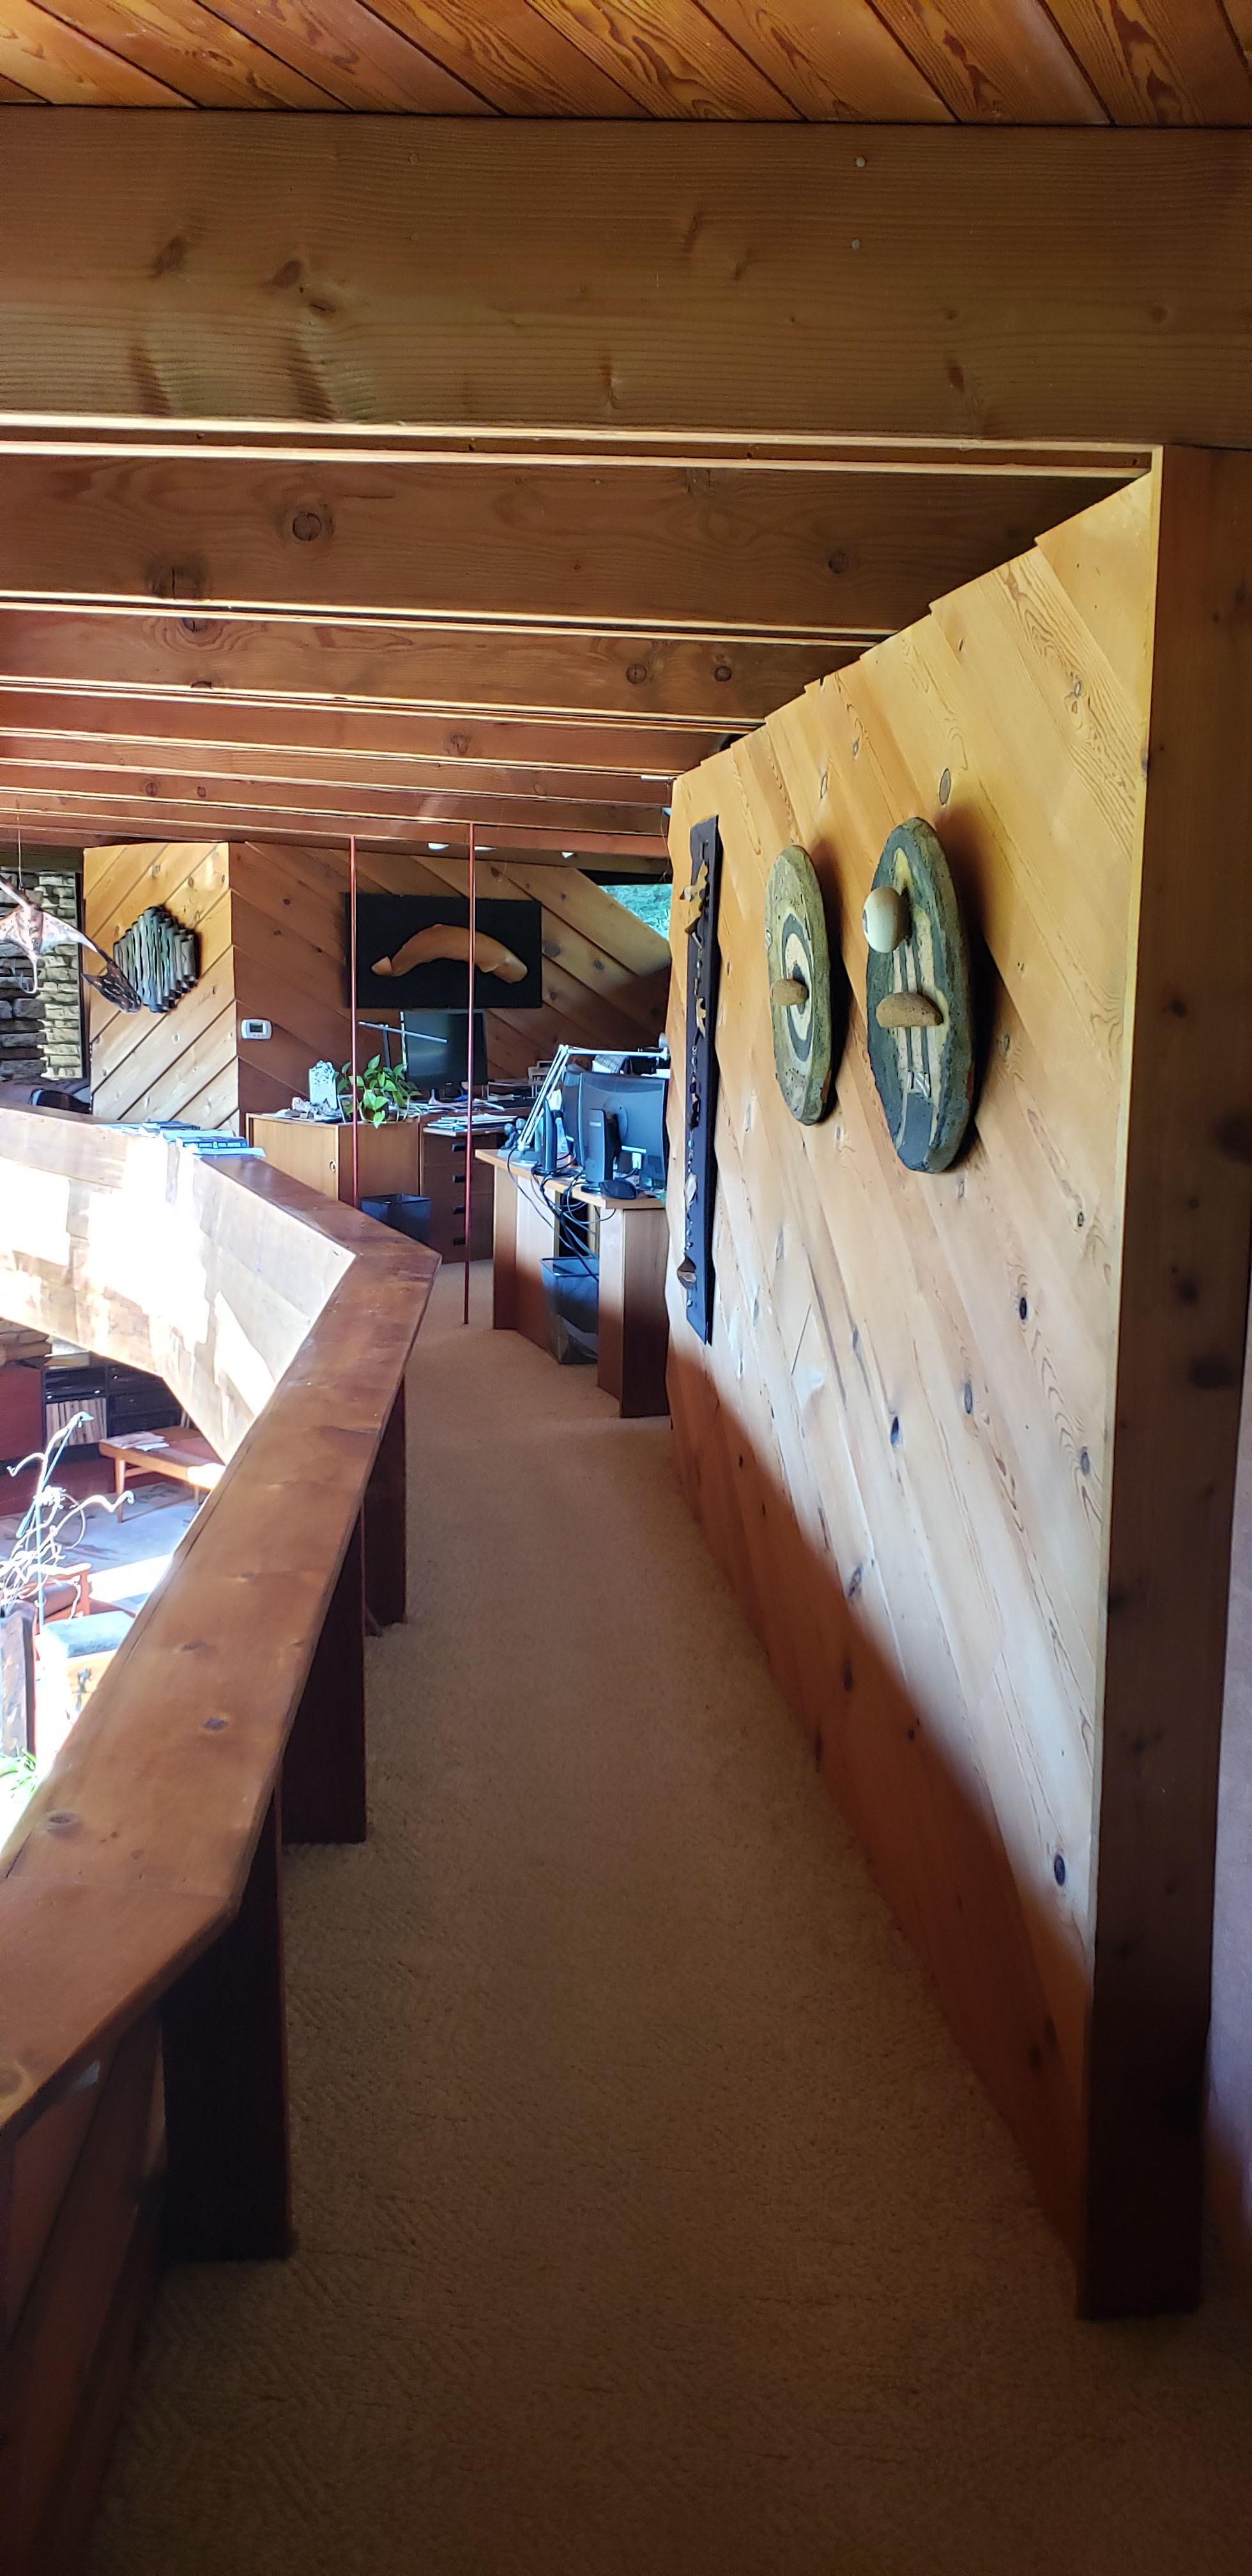
The Moores let me capture some current photos of the house when I moved back east at the end of 2019. The balcony space came out great. They have made this wonderful new space their offices. Before I sold the place this was also our most used space in the house and my office.